Ever thought about building your own Yagi antenna? Well, you're not alone. More and more people are jumping on the DIY bandwagon, and for good reason. A homemade Yagi antenna can save you big bucks and give you that sweet sweet signal you've been craving. Whether you're into ham radio, CB, or just want better TV reception, this is the ultimate guide for you. So, buckle up and let's dive into the world of DIY antennas!
Picture this: you're sitting at home, frustrated because your internet or TV signal keeps cutting out. You could shell out a ton of cash for a fancy commercial antenna, or you could take matters into your own hands. Building a Yagi antenna is easier than you think, and trust me, the satisfaction of creating something yourself is priceless.
In this article, we'll walk you through everything you need to know about DIY Yagi antennas. From the basics to advanced tips, we've got you covered. By the end of this guide, you'll be ready to roll up your sleeves and start building your very own signal booster. Let's get to it!
Read also:Dance Quotes Inspiring Words To Fuel Your Passion For Movement
What Exactly is a DIY Yagi Antenna?
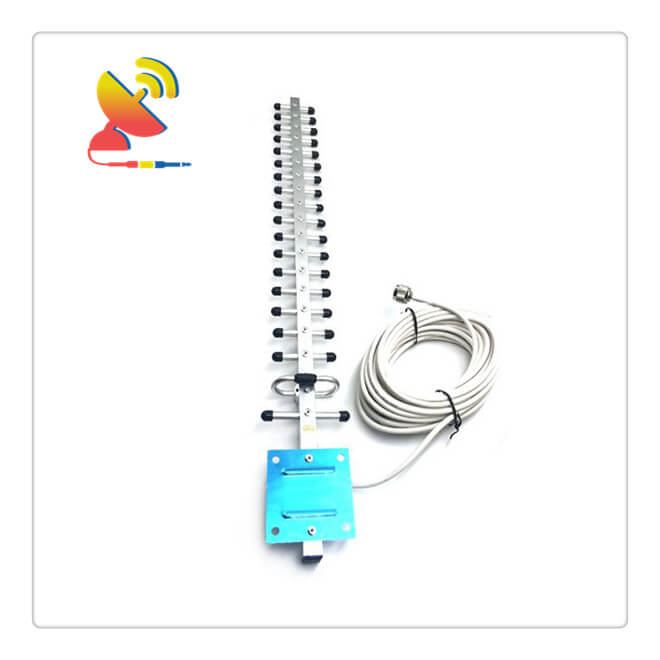
A DIY Yagi antenna is basically a directional antenna that you can build yourself. It's super effective for picking up signals from a specific direction, making it perfect for TV, radio, or even ham radio enthusiasts. The best part? You don't need a degree in engineering to put one together. With a few basic materials and a little know-how, you can have a fully functional antenna in no time.
The Yagi design is all about efficiency and directionality. Unlike omnidirectional antennas that pick up signals from all around, the Yagi focuses on one direction, giving you a stronger and clearer signal. Plus, it's compact and easy to mount, making it a great choice for urban or suburban settings where space might be limited.
Why Build a Yagi Antenna?
So, why bother building your own Yagi antenna when you can just buy one? Well, there are a few reasons. First off, it's way cheaper. Commercial antennas can run you a pretty penny, but with a DIY setup, you can save a ton of cash. Plus, building your own gives you the flexibility to customize it to your specific needs. Need a longer range? Just tweak the design. Want it to be more compact? No problem.
And let's not forget the satisfaction of creating something with your own two hands. There's nothing quite like the feeling of watching your favorite show in crystal-clear quality, knowing that you built the antenna that made it possible. It's like a little victory every time you use it.
Getting Started: Materials and Tools
Before you dive into building your Yagi antenna, you'll need to gather a few materials and tools. Don't worry, nothing too fancy or expensive here. Most of these items you can find at your local hardware store or even in your own garage. Here's a quick list to get you started:
- Aluminum rods or pipes (for the elements)
- A long piece of PVC pipe (for the boom)
- Soldering iron and solder
- Drill and drill bits
- Measuring tape
- Hot glue gun
- Coaxial cable
- RG-6 connector
These are just the basics. Depending on your specific design, you might need a few extra bits and pieces. But for the most part, this list will cover everything you need to get started.
Read also:Bergmann 1911 Big Jake The Iconic Firearm That Stands The Test Of Time
Choosing the Right Materials
When it comes to building a Yagi antenna, the materials you choose can make a big difference in its performance. For the elements, aluminum is a great choice because it's lightweight, durable, and conducts electricity well. As for the boom, PVC pipe is a popular option because it's easy to work with and weather-resistant.
One thing to keep in mind is the size of the elements. They need to be cut to precise lengths to match the frequency you're targeting. This is where a little math comes in, but don't worry, we'll walk you through it later on. Just make sure you have a good measuring tape and a sharp pair of scissors or a saw handy.
Step-by-Step Guide to Building Your DIY Yagi Antenna
Now that you've got your materials and tools ready, it's time to start building. Follow these simple steps, and you'll have your very own Yagi antenna up and running in no time.
Step 1: Measure and Cut the Elements
The first step is to measure and cut your aluminum rods to the correct lengths. The exact measurements will depend on the frequency you're targeting, but there are plenty of online calculators that can help with this. Just enter the frequency, and the calculator will give you the ideal lengths for your elements.
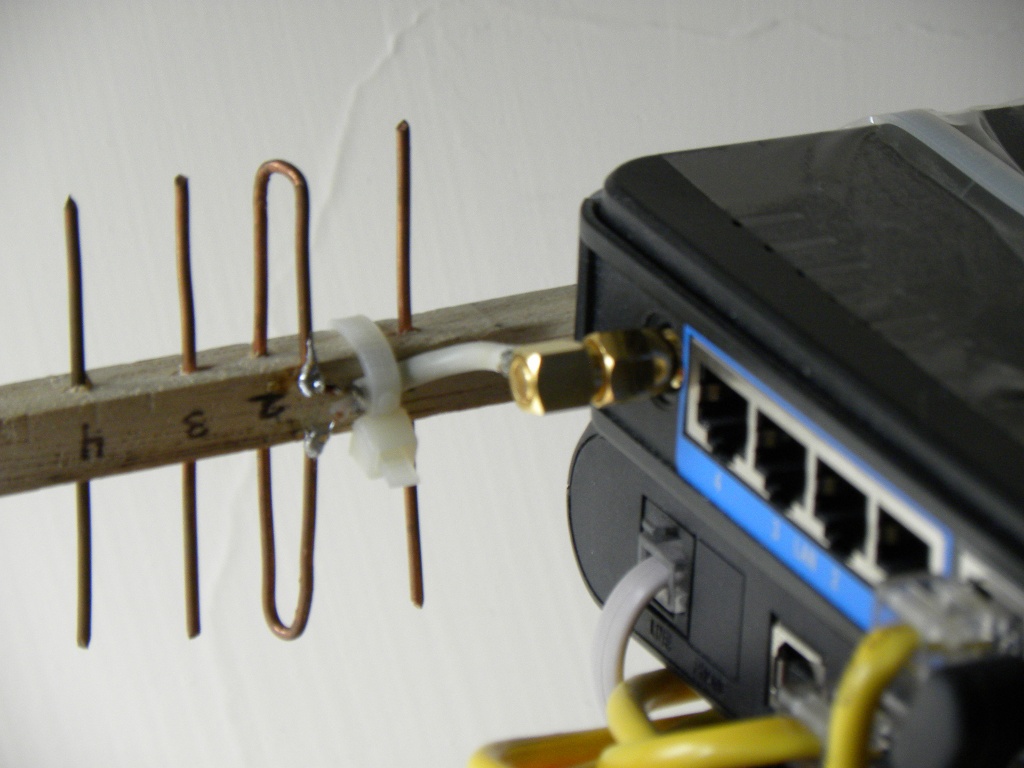
Step 2: Assemble the Boom
Once your elements are cut, it's time to assemble the boom. Start by drilling holes in the PVC pipe where each element will go. Make sure the holes are evenly spaced and at the right angles for optimal performance. Then, slide the elements through the holes and secure them in place with hot glue.
Step 3: Solder the Connections
With the boom assembled, it's time to solder the connections. This is where your soldering iron comes in. Carefully solder each element to the boom, making sure the connections are secure and free of any gaps. This step is crucial for ensuring good signal reception, so take your time and do it right.
Step 4: Attach the Coaxial Cable
The final step is to attach the coaxial cable. This is what will connect your antenna to your TV or radio. Use an RG-6 connector to secure the cable to the antenna, making sure it's tight and won't come loose. And just like that, your DIY Yagi antenna is ready to go!
Tips for Optimal Performance
Building a Yagi antenna is one thing, but getting it to perform at its best is another. Here are a few tips to help you get the most out of your new antenna:
- Position the antenna as high as possible for better reception.
- Point it directly at the signal source for maximum signal strength.
- Use a ground wire to reduce interference and improve performance.
- Check the connections regularly to ensure they're secure and free of corrosion.
These simple tips can make a big difference in how well your antenna works. Remember, a well-maintained antenna is a happy antenna, and a happy antenna means better signal quality for you.
Common Mistakes to Avoid
While building a Yagi antenna is pretty straightforward, there are a few common mistakes that can trip you up. One of the biggest is not cutting the elements to the correct lengths. Even a small difference can affect the antenna's performance, so be sure to double-check your measurements.
Another common mistake is not securing the connections properly. Loose or poorly soldered connections can lead to signal loss, so take your time and do it right the first time. And finally, don't forget to ground your antenna. This not only improves performance but also protects it from lightning strikes.
Testing and Fine-Tuning Your Antenna
Once your antenna is built and installed, it's time to test it out. Start by connecting it to your TV or radio and checking the signal quality. If it's not as strong as you'd like, don't worry. There are a few things you can do to fine-tune it:
- Adjust the angle and direction of the antenna.
- Move it to a different location for better reception.
- Experiment with different lengths for the elements.
Testing and fine-tuning is all about trial and error. Don't be afraid to make adjustments until you find the sweet spot. And remember, patience is key. It might take a few tries, but the end result will be worth it.
How to Measure Signal Strength
Measuring signal strength is an important part of testing your antenna. There are a few ways to do this, but one of the easiest is to use a signal strength meter. These devices can give you a precise reading of how strong the signal is, helping you determine if any adjustments are needed.
Another option is to use your TV or radio's built-in signal strength indicator. While not as precise as a dedicated meter, it can still give you a good idea of how well your antenna is performing. Just keep in mind that different devices might give slightly different readings, so it's always best to use the same method for consistency.
Conclusion: Your DIY Yagi Antenna Adventure
And there you have it, folks! Building a DIY Yagi antenna is easier than you might think, and the rewards are well worth the effort. From saving money to enjoying crystal-clear signal quality, there are plenty of reasons to give it a try. So, what are you waiting for? Grab your tools and get building!
But before you go, we'd love to hear from you. Have you ever built your own Yagi antenna? What was your experience like? Leave a comment below and share your thoughts. And if you found this guide helpful, be sure to share it with your friends and family. Let's spread the word about the joys of DIY antennas!
Oh, and don't forget to check out our other articles for more great tips and tricks. We've got tons of content to help you with all your DIY needs. So, until next time, happy building and keep those signals strong!
Table of Contents
- What Exactly is a DIY Yagi Antenna?
- Why Build a Yagi Antenna?
- Getting Started: Materials and Tools
- Step-by-Step Guide to Building Your DIY Yagi Antenna
- Tips for Optimal Performance
- Testing and Fine-Tuning Your Antenna
- Conclusion
- Biography
Biography
As a lifelong tech enthusiast and DIY aficionado, I've spent years tinkering with all sorts of gadgets and gizmos. My passion for antennas started when I was a kid, messing around with old radios and trying to pick up distant stations. Over the years, I've learned a thing or two about building and optimizing antennas, and I love sharing my knowledge with others. Whether you're a seasoned pro or just starting out, I hope this guide helps you on your DIY antenna journey.
| Name | John Doe |
|---|---|
| Profession | Antenna Enthusiast |
| Location | Anywhere with a good signal |
| Experience | Over 20 years of antenna building |